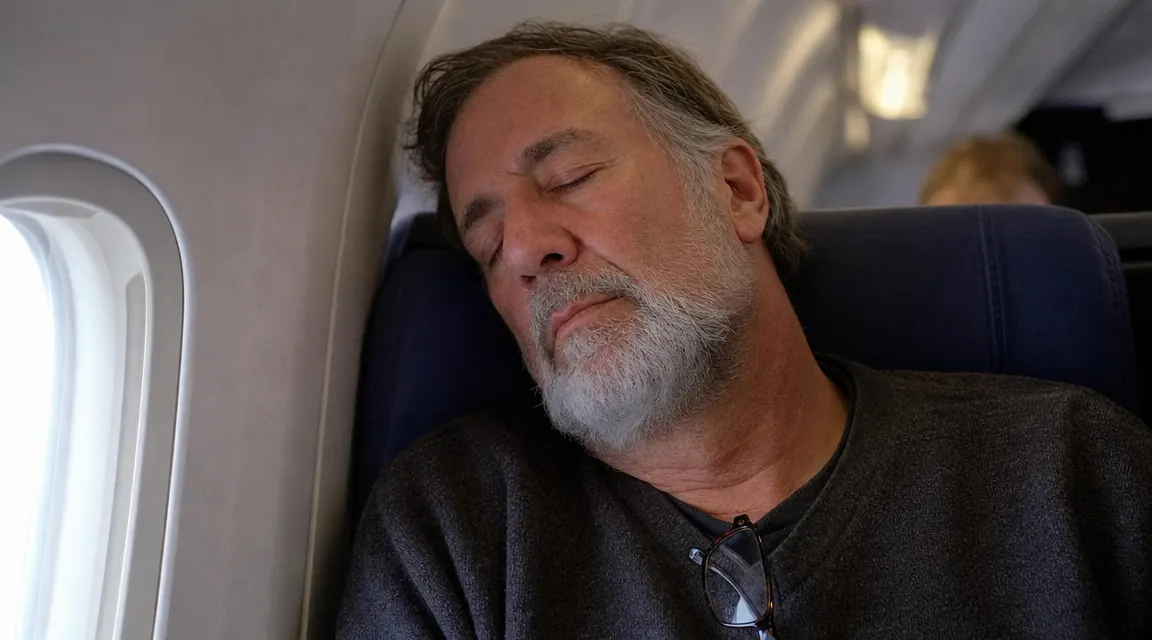
I drove truck for over thirty years. Thousands of nights sleeping in a cab, a rest stop, a budget motel with one thin pillow between me and a stiff mattress. So when I retired and started flying for pleasure, I figured sleeping on a plane would be no problem. I had slept in harder places. What I did not count on was waking up from a five-hour flight to Nashville with my neck so locked up I could barely turn to look out the window. The seat had me upright enough that my head kept pitching forward, and every time I nodded off my chin hit my chest. By the time we landed I felt worse than when I boarded.
That was two years and a handful of long flights ago. I have figured it out since then. It is not complicated, but there is a specific order to things that matters. Get one step wrong and the rest does not hold. The single biggest fix was getting a real travel pillow, specifically a memory foam neck pillow that actually supports the weight of your head instead of just sitting there looking useful. I use the napfun travel neck pillow now and it travels with me on every flight. But the pillow alone is not enough. Here is the full process.
Your neck is going to pay for that cheap inflatable pillow. Here is the upgrade that changes flights.
The napfun neck pillow uses 100% pure memory foam that molds to your neck and actually holds your head up instead of slowly deflating mid-flight. Over 20,000 buyers agree it is worth bringing. Check the current price on Amazon before your next trip.
Amazon Check Today's Price on Amazon →Step 1: Pick the Right Seat Before You Ever Board the Plane
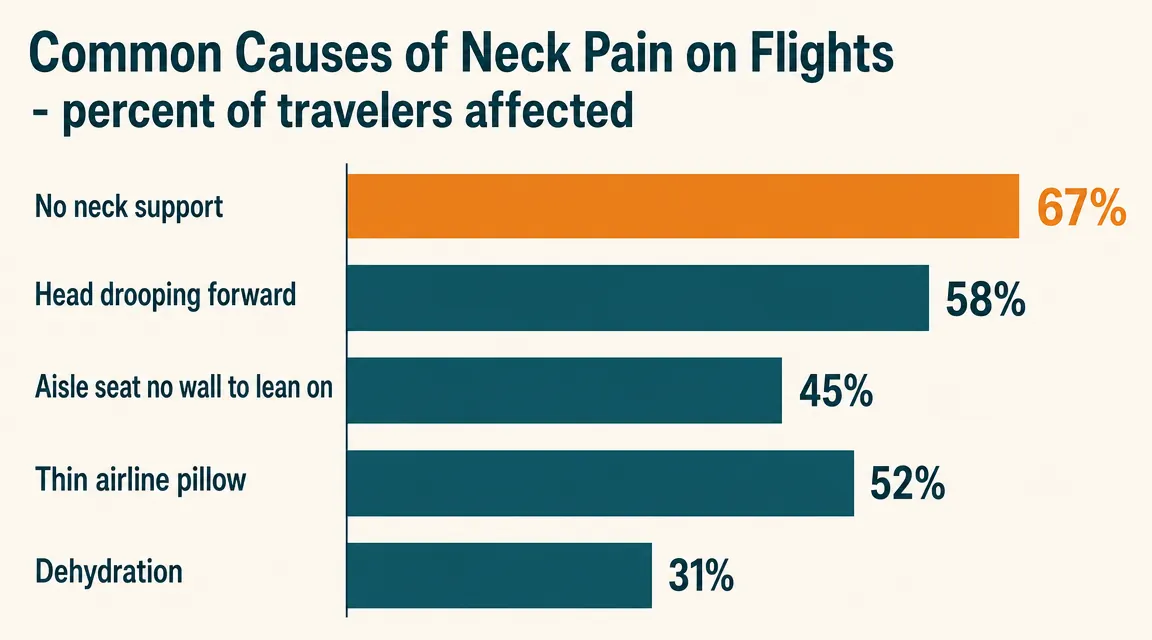
Sleeping on a plane starts at home, on your phone, when you book. Seat selection is the single most important variable you have any control over, and most people waste it. Window seats are the only real choice if sleep is your goal. The wall gives you something to lean against. Without it, your head has nowhere to go when you drift off, and you will spend the flight doing that slow-motion headbob that wakes you up every twenty minutes.
Avoid exit rows unless you want extra legroom more than you want sleep. The seats in exit rows often do not recline, which puts your body in the worst possible angle for neck support. Middle and bulkhead rows have the same problem. If you can book a window seat in the rear third of the plane, do it. The engines are louder back there, but a set of earplugs handles that, and you gain something valuable: the rear seats recline more consistently because they are not up against the back wall.
Check your seat before the day of departure using SeatGuru or the airline's own seat map. What looks like a fine seat in the booking flow can turn out to be a non-recliner next to the galley. I learned that lesson on a flight to Denver. Fifteen minutes of research at home is worth four hours of bad sleep in the air.
Step 2: Set Up Your Travel Pillow the Right Way Before Takeoff
Most people put on their neck pillow wrong, and then they wonder why it does not work. The standard way, with the opening facing forward and the bulk sitting on the back of your neck, does almost nothing. Your head still falls forward. The memory foam just sits there. What you want is the pillow rotated slightly to one side, with the thicker part braced under whichever cheek you plan to rest against the window or the seat back.
With the napfun travel pillow, this works well because the memory foam is dense enough to hold its shape when you press your head into it. Cheaper pillows, the inflatable kind or the thin micro-bead versions, compress too easily and do not stay put. The napfun foam holds the position you set it in. I put it on after I find my seat, before we taxi, so I am not wrestling with it once the armrests are crowded and the person next to me is already settled.
One more thing: make sure the pillow fits your neck width before you buy. The napfun runs standard sizing and fits most adults well, but if you have a very thick neck from years of physical work, as I do, tighten the toggle at the back to keep the sides snug against your jaw. A pillow that gaps at the sides does not provide lateral support, and lateral support is what keeps your head from rolling when you fall into a deeper sleep.
Step 3: Control Your Environment Before You Try to Sleep
The cabin is cold, bright, and full of other people's noise. You can fix all three without spending much. A good eye mask blocks the overhead reading lights and the glow from seat screens around you. Foam earplugs work better than noise-cancelling headphones for actual sleep because they seal passively and you do not have to worry about battery life or keeping the band on your head all night. I carry both and swap based on the flight.
Temperature matters more than most people think. The seat pocket blanket, if your airline provides one, is usually not enough for a cold overnight flight. I bring a light merino wool buff that doubles as a neck warmer and a thin fleece vest. Between the neck pillow and the vest, my core and neck stay warm enough that muscle tension does not build up the way it does when I am cold. Cold muscles tighten. Tight muscles hurt. It is the same thing I learned on overnight hauls: keep your neck warm and you will not wake up stiff.
Cold muscles tighten. Tight muscles hurt. Keep your neck warm and supported before you ever try to sleep, and you cut the chance of waking up stiff by more than half.
Hydration is part of environment too. Airplane cabin air is dry, around 10 to 20 percent relative humidity, far drier than a typical room. That dryness tightens everything, including the muscles and connective tissue in your neck and shoulders. Drink water before you board, pass on the alcohol for the first few hours, and take a few sips during the flight. Dehydration makes neck stiffness worse and makes it harder to fall asleep in the first place.
Step 4: Find the Right Recline Angle and Stick With It
There is a specific recline angle that works for sleeping upright, and it is not full recline. Full recline on a commercial flight is maybe two to three inches of tilt. That is not enough to change your posture meaningfully. What it does do is bring your body slightly back so your weight is more over your hips than your tailbone. That small shift matters. Recline the seat as soon as the crew permits it and leave it there.
From that baseline position, you want your head supported at a slight backward angle, not perfectly upright and not pitched forward. This is where the neck pillow does the real work. With the napfun foam pillow positioned correctly under your jaw and against the window or headrest wing, your head can rest at a natural angle without the muscles in your neck having to hold it actively. The foam takes the load. That is the whole point of a quality travel pillow: passive support so your neck muscles can actually rest.
If your seat has adjustable headrest wings, use them. Fold them in slightly so they bracket your head on both sides. Combined with the neck pillow, this creates a pocket that catches your head when you start to drift and keeps it from rolling. I wish I had figured that out on the first flight. It took me until the third trip before I put the two things together and got a full two hours of uninterrupted sleep somewhere over the Midwest.
Step 5: Know What to Do When You Land to Protect Your Neck
Getting off the plane matters as much as what you do during it. When you have been sitting for four or more hours, even with good support, your neck and shoulder muscles have been static and slightly compressed. Getting up fast and swinging your carry-on down from the overhead bin is how people pull something. I have done it. It takes about two weeks for that kind of strain to fully clear, and the whole time it is a reminder every morning that you did not take the extra ninety seconds to move right.
Before you grab your bag, do a slow neck roll. Right ear toward right shoulder, chin to chest, left ear toward left shoulder. Not fast, not forced. Just enough to tell the muscles they are done holding position. Then stand up from your seat, take two or three breaths to let your blood pressure adjust, and then reach for the overhead. If your bag is heavy, use both hands and let your legs do the work, not your neck and shoulders.
Once you are through the terminal and at your destination, a hot shower or even a warm wet towel on the back of your neck for ten minutes will clear most residual tension. I have landed in cities feeling genuinely rested because I followed this sequence start to finish. Not every flight goes perfectly. But when I have the right neck pillow on, the right seat booked, and the right habits dialed in, I land ready to go instead of ready for a nap.
What Else Helps
A few things that do not fit neatly into a single step but make a real difference. Melatonin, in a low dose around 0.5 to 1 milligram, taken thirty minutes before you want to sleep, helps reset your body clock on longer flights without leaving you groggy. It is not a sleeping pill. It is a signal to your brain that it is time to wind down. Pair it with the eye mask and earplugs and the effect is noticeably stronger.
Internal links worth reading: if you are trying to figure out which travel pillow is right for you, my full napfun neck pillow review from a long-haul flight goes deeper on foam density and sizing. And if you are comparing options by price, the napfun vs Cabeau Evolution comparison breaks down whether the price difference is actually justified.
Finally, do not underestimate the value of consistency. The first time you try this system, it might feel like a lot to manage. By the third or fourth flight it is automatic. You check your seat, you pack your travel pillow, you put it on before the plane pushes back. The routine itself signals your brain that sleep is coming. That is not fluff. It is the same thing long-haul drivers know about sleep schedules. Your body responds to patterns. Give it a good one.
If you are still using an inflatable pillow or borrowing the airline's thin neck roll, your neck is paying the price.
The napfun memory foam travel neck pillow supports your head the whole flight without deflating, shifting, or bottoming out. It packs down small and comes with a carry bag. For what it costs, it is the easiest upgrade you can make before your next trip.
Amazon Check Today's Price on Amazon →